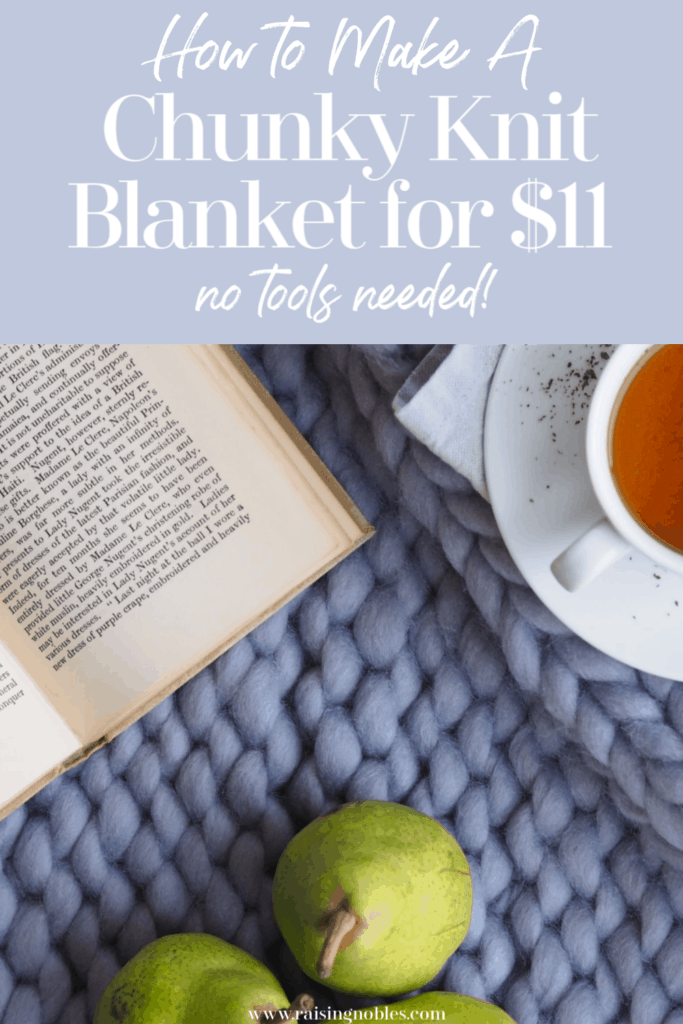
 If you are looking for a super easy to follow tutorial on how to make your own chunky knit blanket, you’ve come to the right place. I have made countless chunky knit blankets using this technique and it’s the fastest and easiest way to make these blankets. In this tutorial I show you step-by-step how to make this DIY chunky knit blanket using only your hands and it couldn’t be easier.
Chunky Knit Blankets
Who doesn’t love the super trendy chunky knit throw blankets? I mean, they are gorgeous. The thick, chunky texture and the colors, it’s all so effortlessly stunning. But if you have looked at the wool knit blankets, you may have been shocked by the price tag – we are talking $300, $400 and upwards of $500+ for a wool chunky knit blanket. I don’t know about you, but paying that amount of money for a chunky knit blanket just isn’t in my budget. But I had to have one – so I immediately set out to figure out a more budget friendly way to get one of these blankets.
I priced wool roving yarn and I quickly found out that was outside of the budget too. Wool yarn is so expensive and then add in shipping? And it’s crazy! So, to Michael’s I went and I found this beautiful chunky yarn for just a few dollars($3.50!!!!!) per skein. This particular color was on clearance at my Michael’s but there were lots of other colors on the shelves too.
This post may contains affiliate links, which means I make a small commission at no extra cost to you. As an Amazon Associate I earn from qualifying purchases.
If you like learning via video, check out my video tutorial.
I hope you enjoy this tutorial and I hope it inspires you to make your own DIY Chunky Knit Blanket!
Want to PIN IT for later? How over this image until the red “pin it” button appears.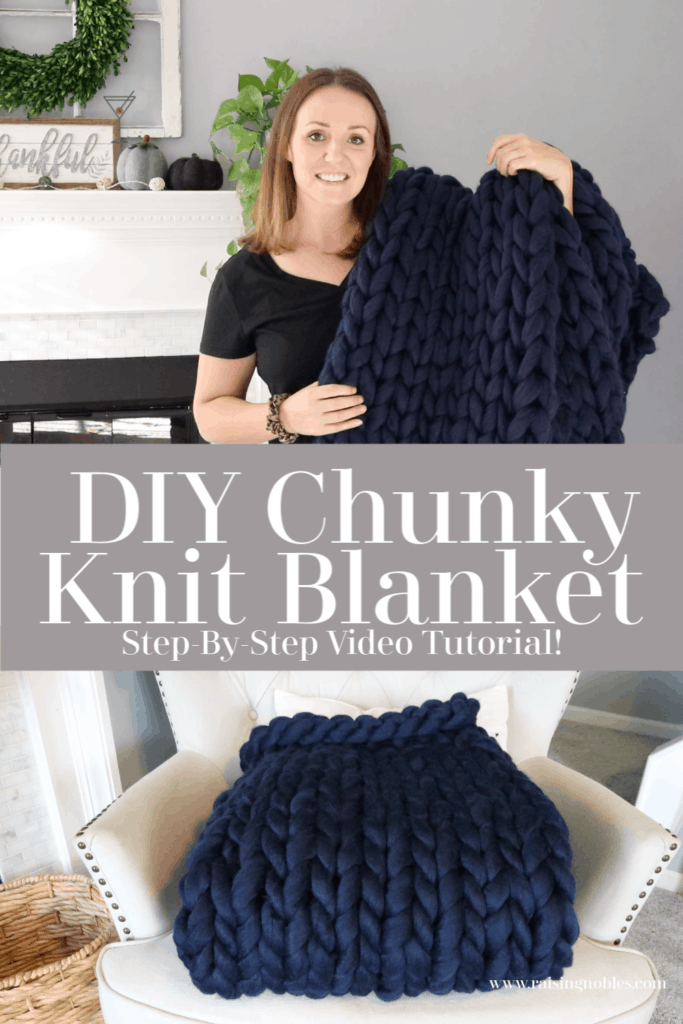
The Best Yarns For Chunky Knit Blankets
Here are a few of my favorite yarns for chunky knit blankets.
- I have used this yarn multiple times and really like the results for chunky knit blankets.
- My absolute favorite for chunky knit blankets is this yarn, called couture jazz.
- The jazz couture yarn comes in a bunch of beautiful colors, like this one here. or Here is another beautiful color for chunky knit blankets.
- Another good one : Another pretty color, by jazz couture
My absolute favorite chunky yarn to work with is the one I mentioned above, Premier yarns, called jazz couture, they have the prettiest colors and the price is reasonable. This yarn also holds up the best to washing, the loop and threads yarn doesn’t hold up as well long term.
Can I Wash My Chunky Knit Blanket?
Yes and no. Depending on the type of yarn you use, you may be able to machine wash your blanket. But if you are using the loop and threads yarn, like I did in this tutorial, you will want to wash your blanket by hand.
Some of the chunky yarns are definitely machine washable, so just check their labels to make sure. My favorite chunky yarn is by premier yarns, called jazz couture, it’s so soft and doesn’t shed like most chunky yarns do. It’s the softest and easiest to work with too. I hand wash jazz couture as well, but I don’t mind. I just use them as throw blankets so I don’t have to wash them super often.
Materials To Make A Chunky Knit Blanket
The only supplies you need for this are yarn and a pair of scissors. I told you it couldn’t be easier!
Here are a few of my favorite yarns for chunky knit blankets.
- I have used this yarn multiple times and really like the results for chunky knit blankets.
- My absolute favorite for chunky knit blankets is this yarn, called couture jazz.
- The jazz couture yarn comes in a bunch of beautiful colors, like this one here. or Here is another beautiful color for chunky knit blankets.
- Another good one : Another pretty color, by jazz couture
My absolute favorite chunky yarn to work with is the one I mentioned above, Premier yarns, called jazz couture, they have the prettiest colors and the price is reasonable. This yarn also holds up the best to washing, the loop and threads yarn doesn’t hold up as well long term.
The Hand Knitting Technique
As I mentioned, this technique uses only your hands. No knitting needles or knitting experience is required. It is very beginner friendly and anyone can do it. If you prefer a video version, definitely check out my youtube video here.
On a large flat surface, such as a table, let’s get started making our chunky knit blanket.
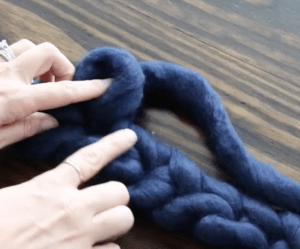
- Start by making a slip knot in your working yarn.
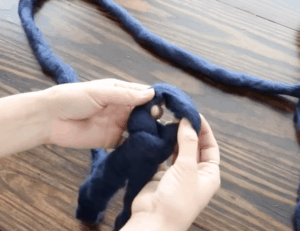
- Next we are going to begin our chain, so using your thumb and pointer finger reach inside of your slip knot and grab the working yarn and pull it through the loop and that is 1 chain.
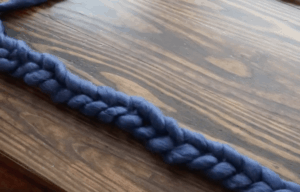
- You get to choose how many chains you do. This chain is the foundation for your chunky knit blanket, so as wide as you want your blanket to be, is as wide as you make your length of chain stitches. I use my measuring tape to measure ever 10-15 stitches to see if I have made my chains long enough.
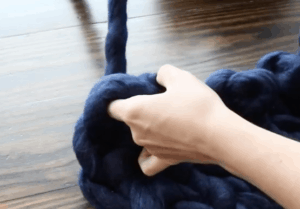
The Chunky Hand Knit Stitch
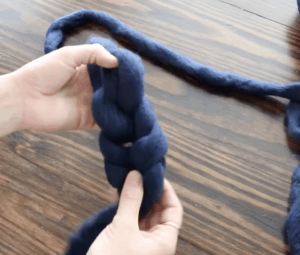
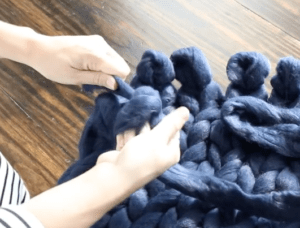
Once you get your length of chains to the width that you want your blanket, it’s time to begin our first “real” sitches. Skipping the first stitch near the end of your chain, stick your thumb and index finger through the top of the stitch and pull a loop of yarn through the loop. You can pull a large loop if you want your blanket to have a more loose knit, or you can pull a smaller loop if you want your blanket to have a tighter knit.
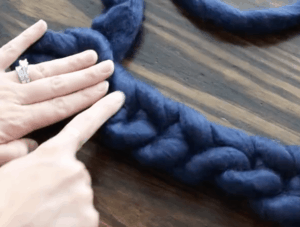
- Continue this stitch in every single chain, all the way down the length of your chain. Once you get to the end, you will skip the first stitch and begin the same process going back down the other direction. Continue this until you get your blanket to the length that you want.
How To Add A New Skein To Your Blanket
- When it’s time to add a new skein of yarn, don’t worry, that’s super simple as well. Simply tight the new yarn onto the working yarn, hide the knot on the BACK of your blanket, that part is important! And then just continue making those stitches all the way up the blanket.
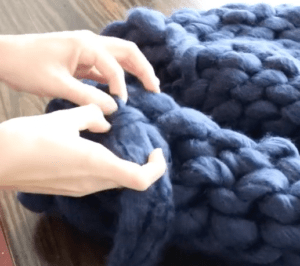
How To Finish Your DIY Knit Blanket
- Once your blanket is the desired length, it’s time to finish off your blanket. Grab two of the loops in your left or right hand, depending on which side you are ending on. I ended on the left side. So I grabbed two loops with my left hand and threaded the working yarn through those two loops towards my left hand.
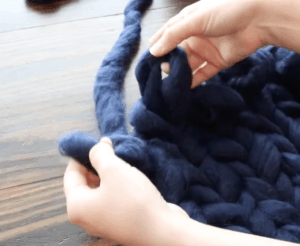
Let the two loops go and now you have one loop in your left hand. Holding that one loop in your left hand, grab another loop from the blanket and pass it to your left hand. Then with your right hand, again, pass the working yarn through the loops towards your left hand and pull the yarn out and you are left with one loop in your hands. Continue that until you get all the loops secured down the blanket.
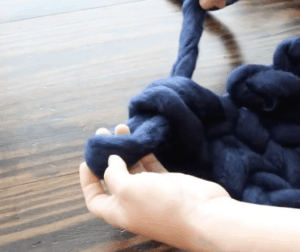
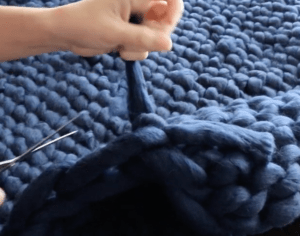
Once you have made it down the blanket, pull the working yarn through the last loops and pull to tighten it up, cut a 6-8″ tail for the yarn to weave into the blanket. Using your hands, weave the tail into the back of the blanket by looping it under and over the stitches to secure it.
Putting The Finishing Touch On Your DIY Chunky Knit Blanket
The very last step is to turn your chunky knit blanket over and make sure all the spots where you joined the yarn is knotted tightly. If they are knotted tightly, go ahead and cut the tails off so you can’t see them.
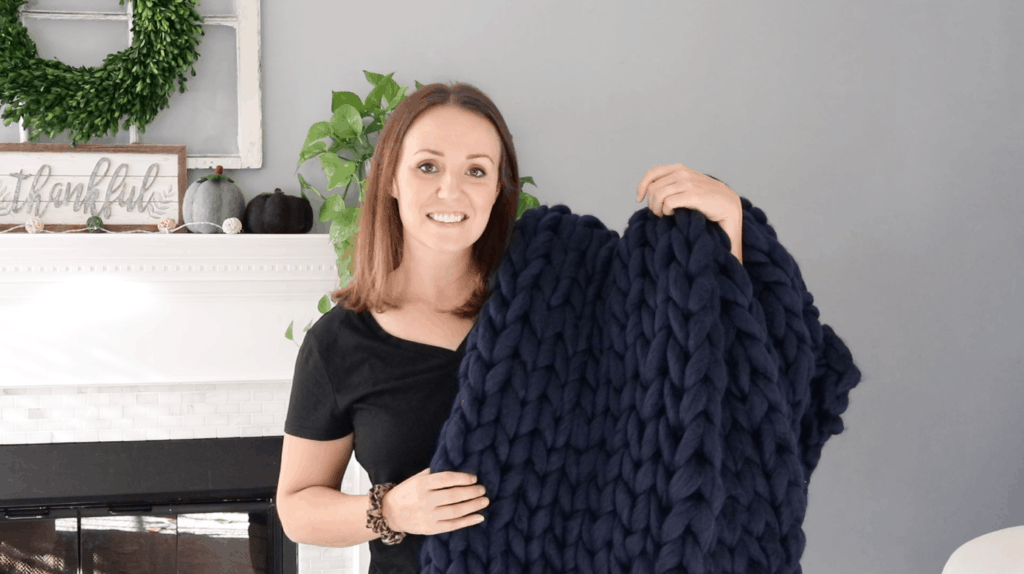
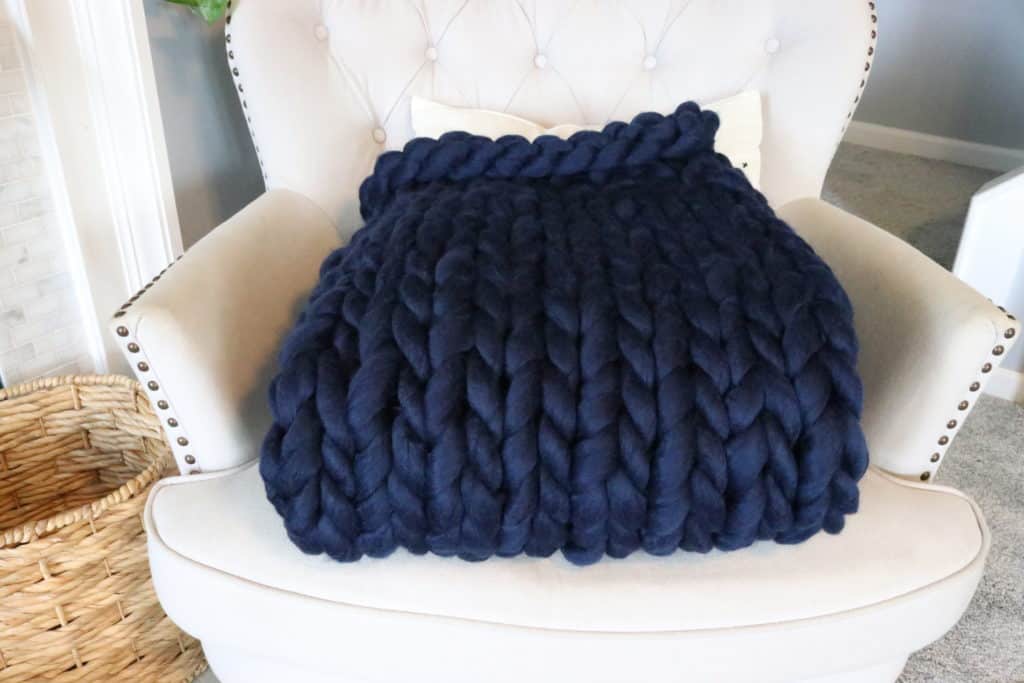
And that’s it! Can you believe it?! You just made a chunky knit blanket using only your hands and some yarn! It’s super fun to do and you can’t beat the texture and coziness these chunky blankets bring to a room.
If you are looking for another fun knitting project, check out my tutorial for making a chunky knit pillow here!