Join us as we share the easiest method to install a diy shiplap wall. This method is so easy and VERY beginner friendly. You can have an amazing shiplap wall in less than a day with this super simple DIY shiplap wall method.
Thank you so much for stopping by! This post contains affiliate links, I receive a small amount of compensation if you choose to purchase from my links (for example – as an Amazon Associate I earn from qualifying purchases). I only link to products that I know and love.
The Easiest Shiplap Method
We have tried several different shiplap wall methods and we finally found the very best. Not only is it the easiest and least labor intensive, but it gives the most beautiful and cleanest result. It’s a win win win.
Tools Needed For DIY Shiplap Wall
- Circular Saw
- Tape Measure
- Level (preferably a 48″ level)
- Air Compressor
- Pin/Nail Gun
- Brad Nails (I used 1.5 inch, 18 gauge nails)
- Safety glasses
- Pencil
- Stud Finder
- Spackling
- Putty Knife
- Fine sand paper or sanding sponge
- It may also be helpful to have a miter box or miter saw for trim pieces
If you are working around an outlet or light switch you will also need…
- Jig Saw
- Electrical wall box extender
- Voltage Tester
- Screw Driver
Before You Head to the Store
Before you head to the store you will need to measure your wall(s) to determine how many shiplap boards you will need. Next determine what type of trim you will be using and measure out how much trim you will need. I typically recommend buying a little extra just in case. you will also need to determine if you will be removing existing baseboards or just installing the shiplap on top of the existing base boards. Also determine what color you will be painting your shiplap and if you have everything you need to paint once the install is complete.
Finding the Studs
First you will need to find the studs in the wall(s) you will be adding shiplap to. You can locate the studs with a stud finder or by checking next to an outlet box or light switch. Studs are typically 16 or 24 inches apart on center. Once you have found the studs mark their location using your level to draw a vertical line all the way up and down the wall(s) you will be adding shiplap to. You can ensure your marks are accurate by drilling a fairly small hole where you have marked you the studs. If there is a stud there you will feel resistance as you drill you hole. If there is not a stud once you puncture the drywall you will feel the drill bit moving pretty freely.

Time to Install the Shiplap
If necessary cut the first board down to the proper size, place your first ship lap board at the base of the wall where you will be installing shiplap. In the case of the product we used there is a front and a back and a top and a bottom. In other words you need to make sure the front of the board is facing out and the top is on top. Before you nail it in, make sure it is level. Walls, floors and the product you will be installing are not always level so it is a good idea to check periodically that the shiplap is staying level. The manufacturer of the product we used recommended putting one nail in the main face of the board and one nail in the tongue. Starting at one end put two nails in the shiplap at each stud (one in the face of the board and one in the tongue). Work your way down ensuring the board remains level and is resting properly on the piece below it. I used my pin gun at about 65 PSI and that seemed to burry the nails just a little into the shiplap for easier spackling later. Continue to add boards working your way up to wall.
Butting Two Shiplap Boards Together
If your wall is longer than your shiplap boards you will have joints where the boards meet. The easiest method is to simply join two pieces together that have a standard 90 degree cut. These joints are typically a little more visible but easier to do. You can leave these joints for a more rustic look or go back and fill them in with spackling once you are finished installing the boards.
Cutting Around Electrical Boxes and Light Switches
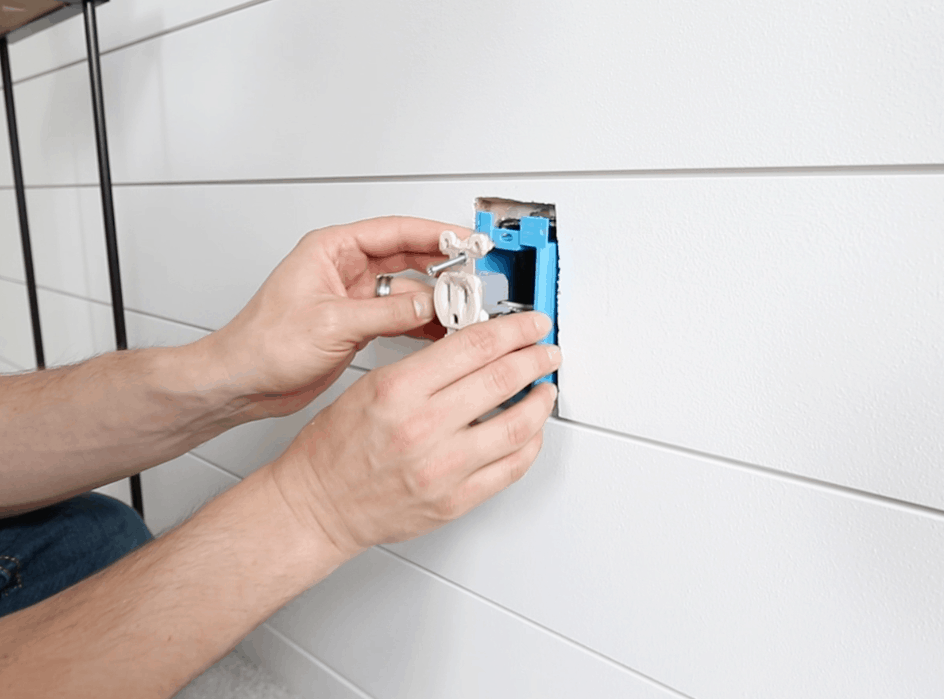
If there are electrical outlets or light switches on the wall(s) you are adding shiplap to you will need to cut the shiplap boards around the box. First take off the face plate then measure where you will need to cut your boards and use your jigsaw to cut out a space for the box. Make sure you cut enough so the you can access the outlet, but not so much that the face plate won’t cover the hole. If you make a mistake you can purchase oversize face plates : ) After you have installed your shiplap, cut the power to the outlet and check to make sure there is no electrical current using your voltage tester. In my opinion you can never be too careful when it comes to electricity. Follow the directions on your box extender to pull the outlet out to line up with the shiplap then you can turn the power back on.
Adding Trim
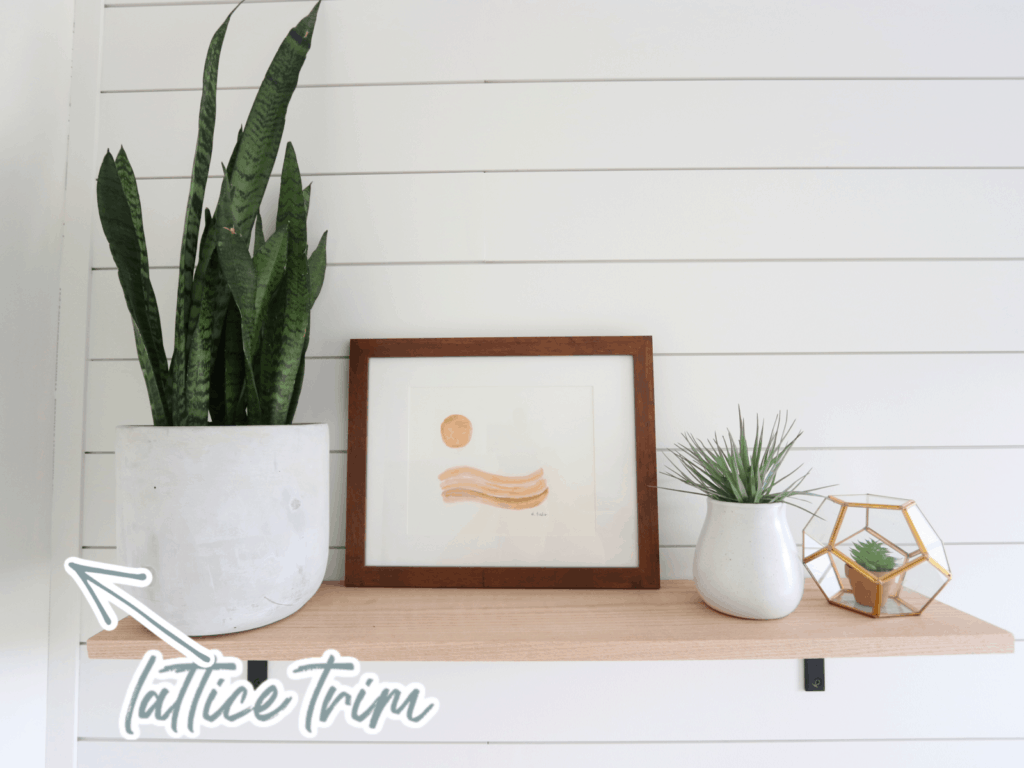
We chose to use lattice trim for our shiplap accent wall. We thought rectangular shape matched the style of the shiplap well and gave it a nice finished look. Measure the wall(s) you will be adding trim to at the ceiling and cut both ends of the trim at a 45 degree angle. Next measure the walls and cut one end of the trim at a 45 degree angle (to fit in the with ceiling trim) and the other with a standard 90 cut (for where it meets the floor). Attached to\he trim using the pin gun with nails every 18 inches or so.
Finishing Touches
Once you have finished installing the shiplap and trim, fill the nail holes with spackle and a putty knife. You can also fill the joints where the boards meet. Once the spackle is dry sand it with a fine grit sand paper or sanding sponge. Next up your shiplap is ready to paint!
Enjoy!
You are done! We hope this tutorial has been helpful and that you enjoy your beautiful new shiplap wall for years to come.

This is so great!
thank you!
This is so pretty! Thanks for the tutorial!
Thank you so much! I’m glad you enjoyed it!
Love it! We love putting shiplap up too!
Thank you! Yes it’s one of my favorite ways to spruce up a room